Manage WiFi on Windows 8.1

We were surprised when we saw that Windows 8.1 seems removed the capability of connecting to a wireless network secured with WPA/TKIP Enterprise.
This post will explain to you how to connect your Windows 8.1 laptop to a WPA/TKIP Enterprise wireless network and how to export the profile (to be able to import it later).
Before starting
Microsoft removed the capability to set up the WPA security wireless and its associated types of encryption (c.-TKIP). While most companies have switched to WPA2 or better, there are still many companies still using WPA/TKIP Enterprise.
Even if Microsoft removed this feature from the wireless configuration interface, they apparently did not remove that capability from the operating system.
Here are step-by-step instructions on how to get your computer or other device running Windows 8.1 to connect to a wireless network running WPA/TKIP Enterprise.
Configuration
[note]Note
In this case, the wireless network will named:w_contoso
- Open a Windows Command Prompt (cmd) as Administrator
Remove an existing profile
- With the cmdlet below, display all wireless network profiles:
netsh wlan show profiles
- If the profile
w_contosoappear into the list of profiles, you have to delete it with this cmdlet:netsh wlan delete profile name="w_contoso"
Create a new connexion
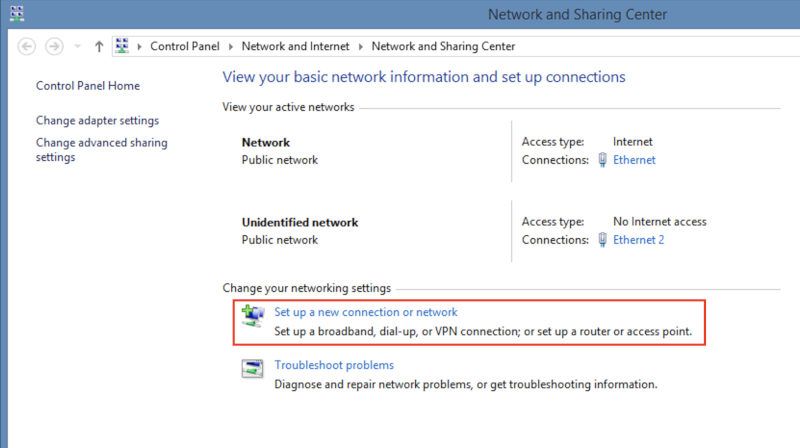
- Perform a right-click on the network icon from the Windows taskbar
- From the contextual menu, click on Open the network and sharing center

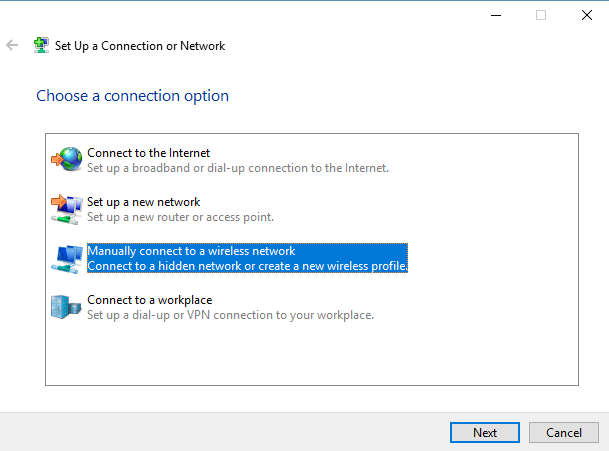
- Click on Set up a new connection or network
- Click on Manually connect to a wireless network
- Enter information for the wireless network:
Network name (SSID): w_contoso
Security type: WPA2-Enterprise (temporarely)
Encryption type: AES (by default)
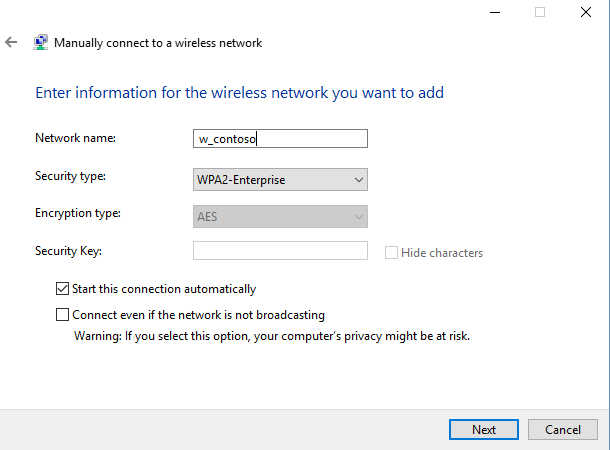
- Once completed, click on Next then Close to finish
Edit existing connexion
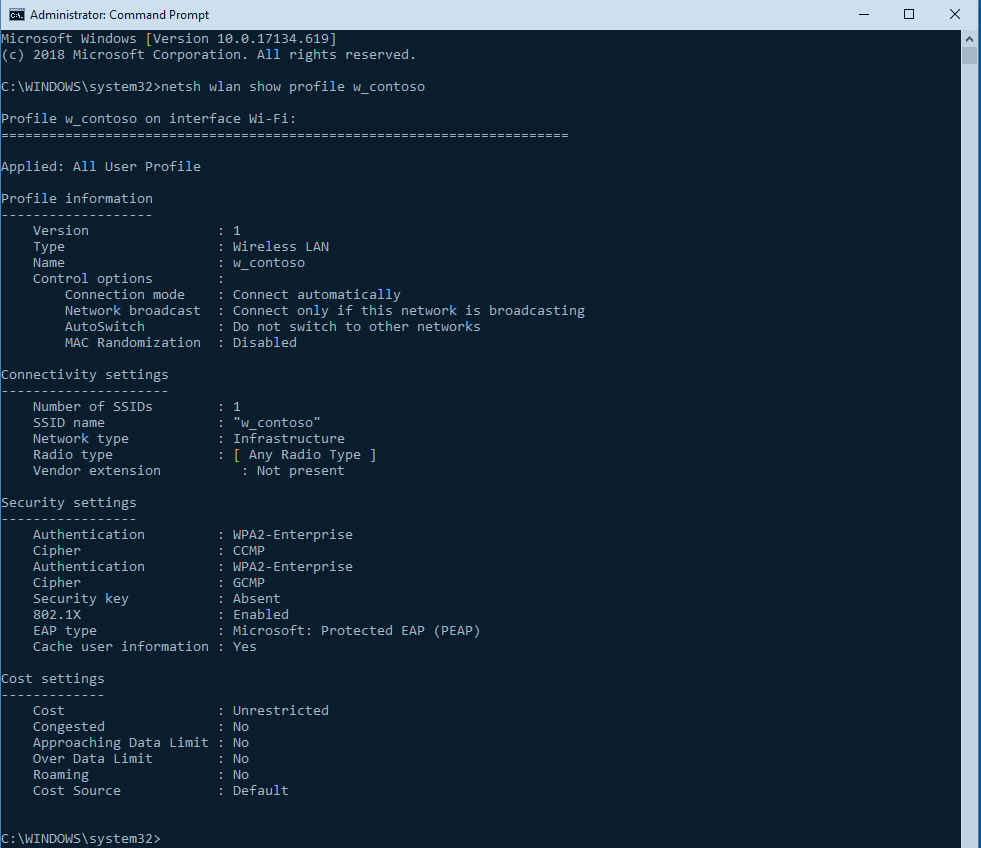
- To ensure that the wireless network profile was correctly added to the list of wireless profiles of Windows, use the below cmdlet:
netsh wlan show profile w_contoso
without quotation marks around the SSID
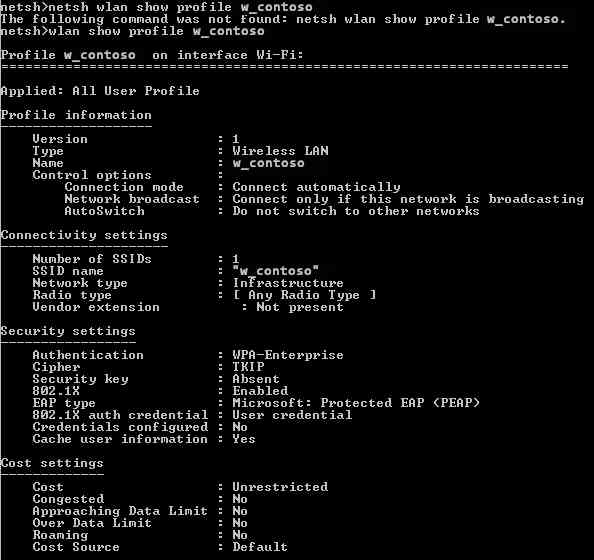
- Enter the command
netsh wlan
- Entrer la configuration du profile réseau sans fil:
netsh wlan set profileparameter name=w_contoso authentication=wpa encryption=tkip authMode=userOnly
Check configuration
- You can check the wireless profile configuration with the below cmdlet:
netsh wlan show profile w_contoso
without quotation marks around the SSID
Export profile
- To keep a backup of a configuration of the wireless profile, it is possible to export it into an XML file, like this:
netsh wlan export profile name="w_contoso"
Import profile
- To restore the configuration of a wireless profile, tape the below cmdlet:
netsh wlan add profile filename="path\w_contoso-profile.xml"
Bonus
Forgot password?
- Retrieve the list of existing WiFi profiles
netsh wlan show profile - Display information and WiFi password in clear of
w_contosowireless network profilenetsh wlan show profile "w_contoso" key=clear
Hoping this post will help you 🚀
You may also be interested in