Configure Google Tag Manager for SharePoint

In this blog post, we will see how to open a free account of Google Analytics (not Analytics 360 for enterprise) and how to implement a basic configuration.
[success]Tip
If you do not know if the free version is sufficient, feel free to check the Google compare: https://marketingplatform.google.com/about/analytics-360/compare/
Create a Google Account
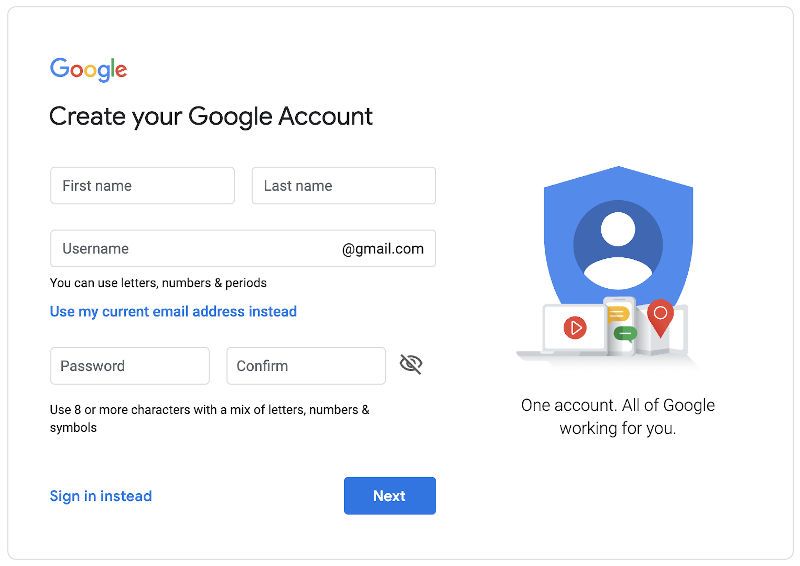
If you already have a Google account, you can skip this step, otherwise, the first step is to create an account that allows you to enable the Google services (linked to this account) and configure them. Fill out the following form to create a new Google account: https://accounts.google.com/signup.
Enable Google Analytics
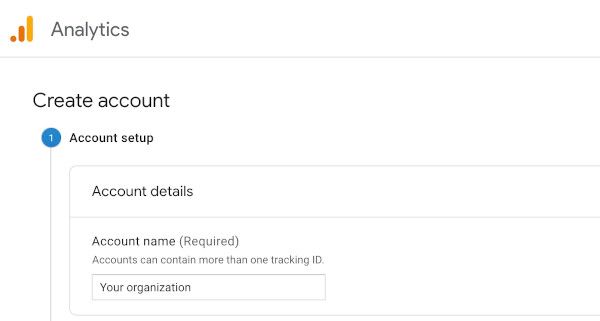
With your Google account, enable the Google Analytics service and create your first analytics account from this URL: https://analytics.google.com/analytics/web/provision

- Click on Set up for free or Start measuring button
- Specify an Account name
- From the area Account Data Sharing Settings, keep the cases checked or uncheck them in accordance with your organization policies
- Click Next
- Choose Web measure (selected by default)
- Click Next
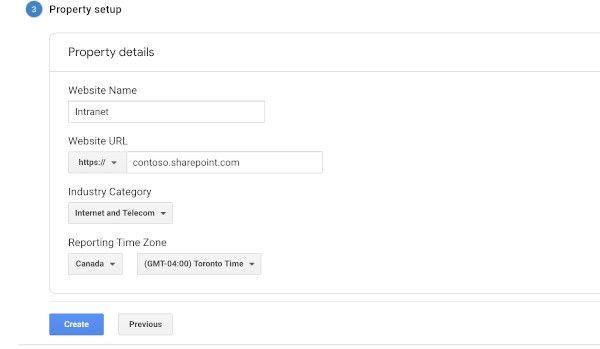
- Specify a Website Name (example: Intranet)
- Specify the Website URL (site collection or whole Tenant. Example: https://contoso.sharepoint.com)
- Specify Industry Category and TimeZone in accordance with your organization
- Click Create
- Accept the Google Analytics Terms of Service Agreement
You are redirected to the ADMIN area and you should see your first Tracking ID.
If you already have an account and you want to create a new one:
- Go to the ADMIN and click on the button
+ Create Account. Then, follow the steps of this chapter from point 2
or an instance (property) and you want to create a new one:
- Go to the ADMIN and click on the button
+ Create Property. Then, follow the steps of this chapter from point 5
[note]Note
Keep the Tracking ID in mind because we will need it later
Configure Google Analytics instance (property)
From this chapter, your Google Analytics property is ready to record activity.
If you wish Google Analytics to detect when your users perform an internal search (SharePoint search), an additional configuration is required.
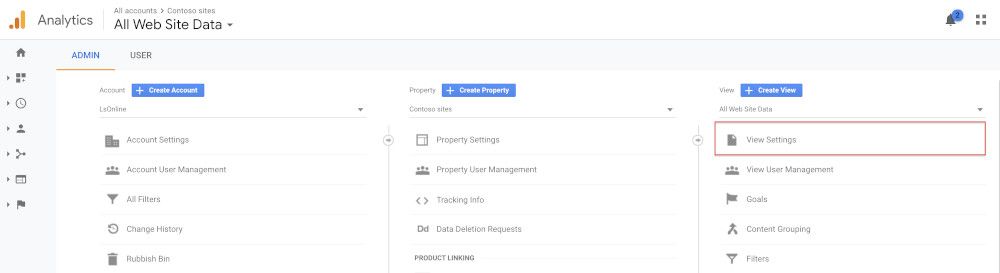
- From the ADMIN area, click on the View Settings under the View column
- At the bottom of the page, enable Site search Tracking
- Into the Query parameter field, insert
q,query,k,keyword
[note]Note
If you use the default SharePoint modern search, when a user perform an internal search, the URL parameter that contains the keywords is "q". The other options can be useful.
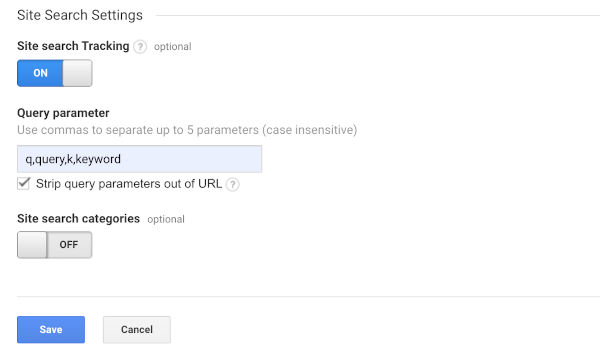
- Click Save
At this step, you can already use the Google Analytics SharePoint Extension
Enable Google Tag Manager
With your Google account, enable the Google Tag Manager from this URL: https://tagmanager.google.com/
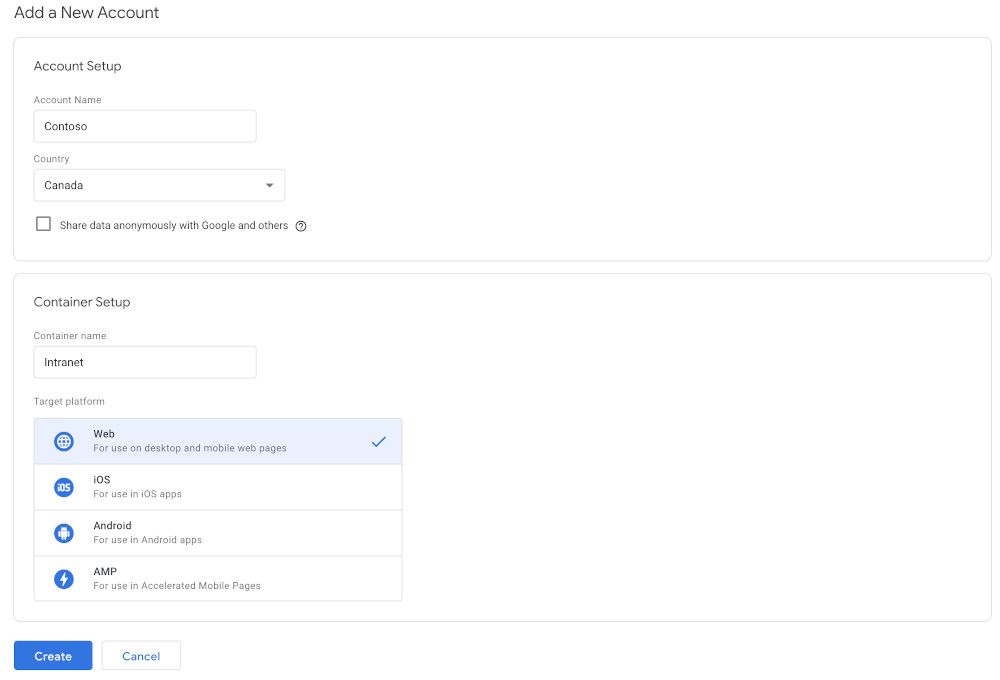
- Click on the button Create Account
- Fill out the form
- Account Name: company name or all other significant names
- Country: your country
- Container: because you can have several containers into the same account, you can set the name of your application (example: Intranet)
- Target platform: in our case, SharePoint is a Web platform
- Click Create
- Accept the Google Tag Manager Terms of Service
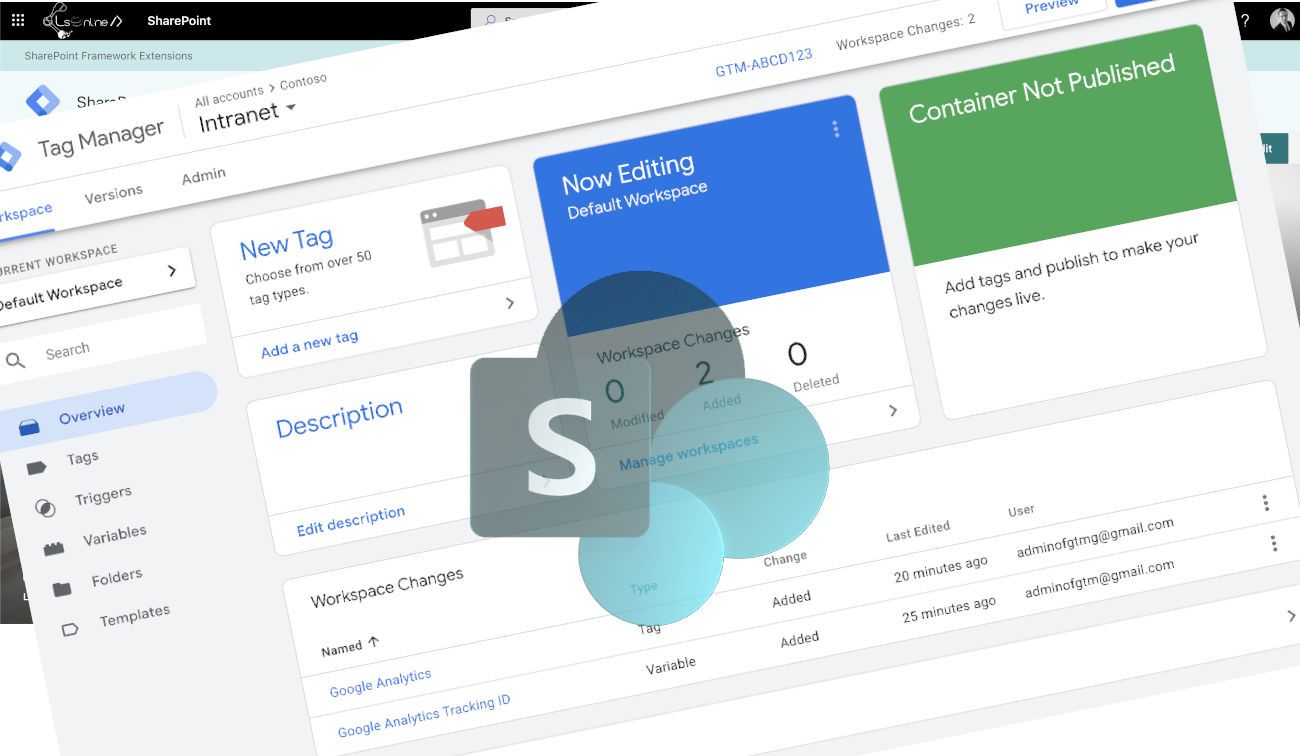
From the Google Tag Manager workspace or the Tag Manager Home page (the URL at the beginning of this chapter) you can see the Tag Manager Tracking ID.
Configure Google Tag Manager
Now, your Google Tag Manager is ready to be used but in this state, you do not send any data into your Google Analytics.
Google Tag Manager does not work alone. Google Tag Manager is a sort of "Layer" over Google Analytics that allows you to configure custom events, tags, and triggers. It does not store/record the KPI; it is the job of Google Analytics to store and create reports/dashboards.
To allow your Tag Manager to send data to your Google Analytics, follow these steps:
- From your Tag Manager workspace, select the Tags from the left navigation
- Click on the button New to create a new Tag
- From the Tag Configuration area, click on the pen (the pen appears when the cursor is hovering the area)
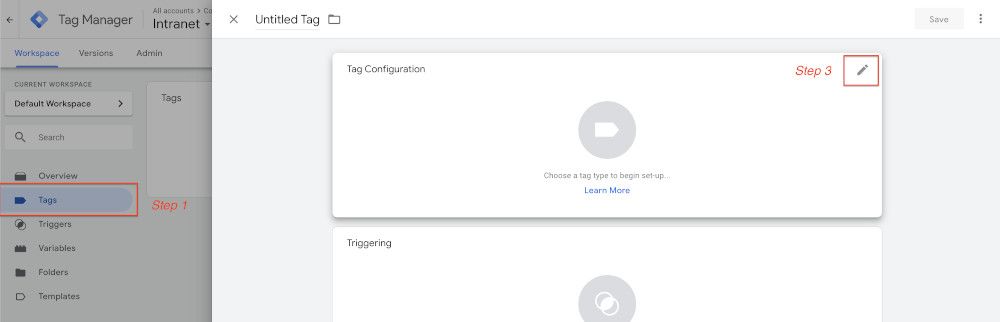
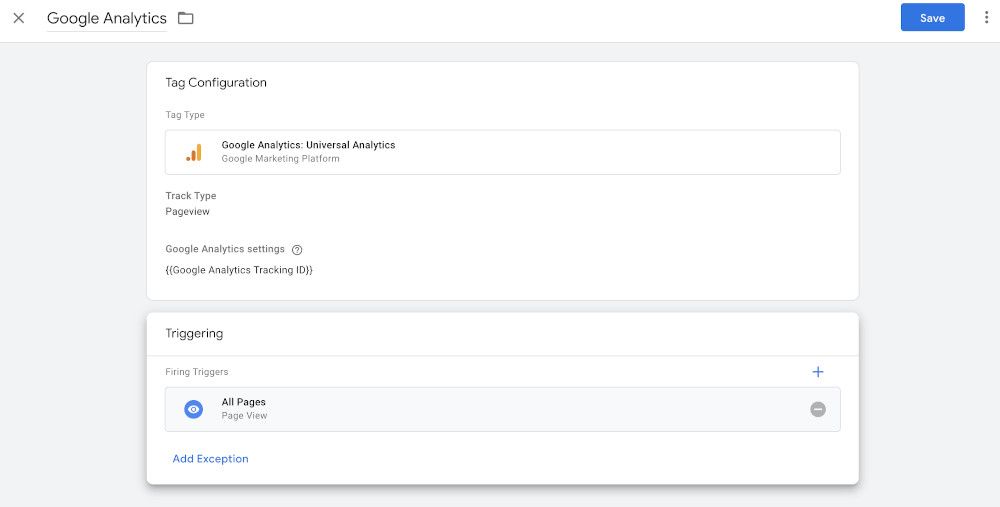
- Select the feature Google Analytics: Universal Analytics

- Choose a title of the Tag (example: Google Analytics)
- Define the Google Analytics Settings by adding a new variable
- Define a title of this variable (example: Google Analytics Tracking ID)
- In this new variable, define the Google Analytics Tracking ID generated in the chapter Enable Google Analytics
- Click Save
After clicking on the button Save, you will be redirected to the previous tag creation (Google Analytics).
- From the Triggering area, click on the pen (the pen appears when the cursor is hovering the area)
- Select the All Pages trigger (that means, the Tag Google Analytics will be triggered for each page that includes the Tag Manager script)
- Click Save
Now, your configuration is ready. The last thing to do is to Submit your workspace configuration (it is like a Publish) and include the solution to your SharePoint pages.
At this stage, you have the same capabilities as Google Analytics only.
For all additional events, tags and triggers, you have to configure your workspace and send the data to your Google Analytics.
Hoping this post will help you ?
You may also be interested in