
Configure dynamic fields on your SharePoint Forms

If you have already wanted to create some dynamic fields into the SharePoint item form in accordance with the selected value from another field, you have often been forced to use Microsoft Power Apps due to this kind of use case... How about if I tell you that for some very simple use cases, it is possible without Power Apps?
Almost every week, sometimes during several days, Microsoft rolls out new features for SharePoint Online and other Microsoft 365 services. It is not easy to follow all new features and sometimes the smallest ones can become really useful like the update feature Conditionally show or hide columns in a SharePoint list or library form.
Until now, when you wanted to configure which column had to be displayed in accordance with a value from another field, the only choice was to use Power Apps.
Here an example of a use case:
- A mandatory column of type Choice named Provider. The choices are:
- Microsoft
- PnP Community
- A column of type Choice named MSProducts. List of several Microsoft 365 services
- A column of type Choice named PnPProducts. List of several products provided by the PnP Community
- When the Microsoft value is selected from the Provider column, the MSProducts field has to be displayed and the PnPProducts hidden
- When the PnP Community value is selected from the Provider column, the PnPProducts field has to be displayed and the MSProducts hidden
Steps of configuration
- Create a new item to the list
- Once created, open the display panel by clicking on the title (by default)
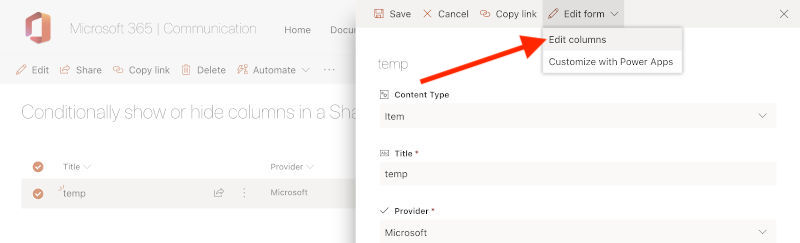
- From the header of the panel, expand Edit form and click on Edit columns
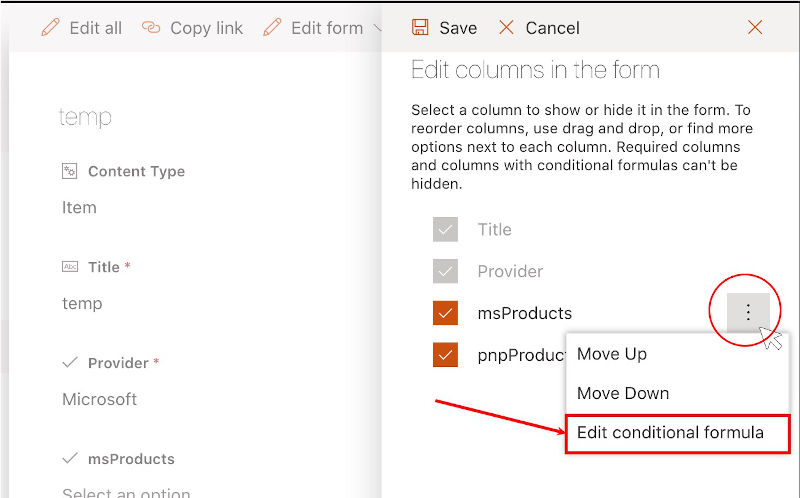
- From the panel of columns, hover onto the target column (MSProducts) and click on the ellipsis
- Click on Edit conditional formula
- From the dialog, enter the following formula:
=if([$Provider]== 'Microsoft', 'true', 'false') - Click on Save

- Edit the Conditional Formula of the other column (PnPProducts)
- Enter the following formula:
=if([$Provider]== 'PnP Community', 'true', 'false') - Click on Save
- Click Save from the panel
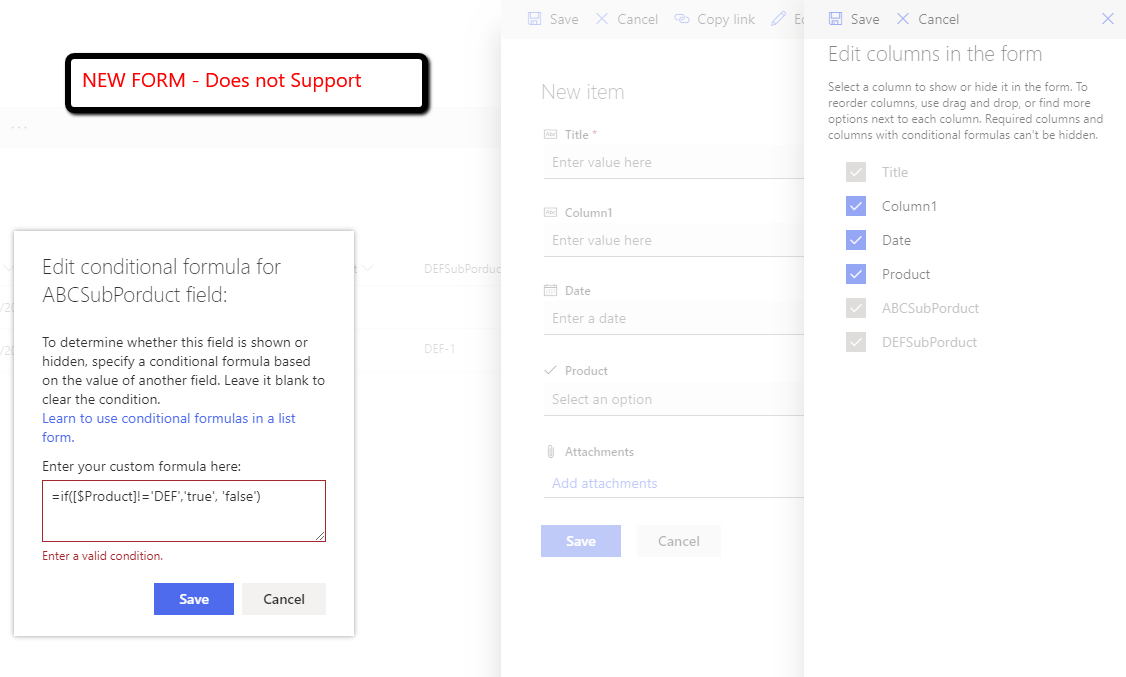
For those who are curious and want to know why we are currently editing the Display form rather than the Edit form, I do not have any logical explanation ??♂️??
Before writing this post, I tried to configure the Edit form but the formulas were not valid...
From now on, if you create a new item, in accordance with the selected value from the Provider field, the MSProducts or PnPProducts will appear and all without a Power Apps form. How cool is that? ???
[note]Note
If you select a first provider and choose a MSProduct then change the provider and select a PnPProduct, both will be defined when you save the item.
Reference:
[note]Note
All column types are supported except:
- Person columns with multiple selections
- Time calculations in DateTime column
- Currency columns
- Location columns
- Calculated columns
- Managed Metadata columns
Hoping this post will help you ?
You may also be interested in