Elasticsearch as search engine for your Ghost blog

If you have a personal or professional blog based on the Ghost blog CMS, you know how it is speed and user-friendly but unfortunately lacks a search engine.
My own blog is currently based on Ghost and I tried a couple of time to find the best solution to implement an efficient and manageable search engine. There are a lot of workarounds to add a search engine and here are three solutions on which I have focused:
- Ghost Hunter: this is the first search engine I implemented into my blog. Very easy to set up, the latest version uses the new Ghost v2 Content API and no additional skill in development is necessary.
As you can imagine, this solution is simple and it provides a limited offer on the control on the search experience and results. - Azure Search: an awesome workaround based on the Microsoft professional platform. If you are used to working with the Microsoft environment, that can be a really good choice. In addition, Azure Search has up to 10 000 free documents ?. I hesitated a long time to use this solution but in my case, I prefer to host as far as possible the services on my own VPS to avoid spreading my data into the Cloud.
By the way, Waldek Mastykarz wrote an awesome post to implement Azure Search with a hosted Ghost blog. - Elasticsearch: a real professional open-source alternative that I implemented into my blog because Elastic offers several setup ways including Docker.
The post Intégrez ElasticSearch comme moteur de recherche à votre site Internet written by Ludovic Toinel is really helpful and provides a good approach on how to configure Elasticsearch for Ghost.
Using Elasticsearch with a self-hosted Docker Ghost blog
I will not dwell on the Ghost blog docker-compose, I will focus on the Elasticsearch stack and all the configurations. I assume that your Ghost blog and his database are already up.
Elasticsearch Docker
version: '3.7'

services:
  ghost-elasticsearch:
    image: docker.elastic.co/elasticsearch/elasticsearch:7.8.0
    ports:
      - 9200:9200
    environment:
      - bootstrap.memory_lock=true
      - "ES_JAVA_OPTS=-Xms512m -Xmx512m"
      - ELASTIC_USERNAME=elastic
      - ELASTIC_PASSWORD=password01
      - xpack.license.self_generated.type=trial
      - xpack.security.enabled=true
      - discovery.type=single-node
    volumes:
      - type: bind
        source: ./elasticsearch
        target: /usr/share/elasticsearch/data
restart: always- ports: the principal port used to request the search is the 9200 one
- environment:
- xpack.security.enabled: must be defined as true if you want to add basic authentication to access your search engine
- xpack.license.self_generated.type: must be trial if you want to use the security
- ELASTIC_USERNAME: can not be other than elastic. This variable is effective only if the security is enabled. It is not mandatory, you can disable the security if you want to
- ELASTIC_PASSWORD: if you enable the security, you have to specify the password for the elastic account
- volumes: specify a local folder to persist the search data
Elasticsearch can not connect directly to your Ghost blog database and index the content alone, this is why Logstash is necessary.
Logstash Docker
ghost-elastic-logstash:
    image: docker.elastic.co/logstash/logstash:7.8.0
    command: logstash -f /usr/share/logstash/pipeline/logstash.conf
    environment:
      - "ES_JAVA_OPTS=-Xms512m -Xmx512m"
      - XPACK_MONITORING_ENABLED=false
    volumes:
      - type: bind
        source: ./mysql-connector-java-5.1.49.jar
        target: /usr/share/logstash/vendor/mysql/mysql-connector-java-5.1.49.jar
      - type: bind
        source: ./logstash.conf
        target: /usr/share/logstash/pipeline/logstash.conf
    depends_on:
      - ghost-elasticsearch
restart: always- command: load the Logstash config defined into the logstash.conf file
- environment:
- JVM options: https://www.elastic.co/guide/en/elasticsearch/reference/6.8/jvm-options.html
- XPACK_MONITORING_ENABLED: set to false because we do not need to monitor the Elasticsearch cluster in our case
- volumes:
- The MySQL connector allows Logstash to connect to the Ghost MySQL database. This connector is not included in the docker image, you must download the connector (you can download it directly from the MySQL Community) and bind it with your docker container.
- Logstash configuration file allows configuring the input database and the output to Elasticsearch
- depends_on: wait until Elasticsearch container is up before launching Logstash
Logstash configuration
Before launching the docker-compose, it is necessary to configure Logstash through the logstash.conf file:
input {
  jdbc {
    jdbc_connection_string => "jdbc:mysql://mysql-ghost:3306/ghost"
    jdbc_user => "blog-user"
    jdbc_password => "supersecret"
    jdbc_driver_library => "/usr/share/logstash/vendor/mysql/mysql-connector-java-5.1.49.jar"
    jdbc_driver_class => "com.mysql.jdbc.Driver"
    statement => "SELECT id,title,custom_excerpt,slug,featured,feature_image,published_at,updated_at,type,status,visibility, (CASE type WHEN 'post' THEN CONCAT(DATE_FORMAT(published_at, '/%Y/%m/%d/'), slug) ELSE slug END) as 'url' FROM posts WHERE `published_at` IS NOT NULL UNION SELECT resource_id as 'id','' as 'title','' as 'custom_excerpt','' as 'slug',0 as 'featured','' as 'feature_image',NULL as 'published_at',NULL as 'updated_at',resource_type as 'type','deleted' as 'status','' as 'visibility', '' as 'url' FROM actions WHERE `resource_type`='post' AND `event`='deleted'"
    use_column_value => true
    tracking_column => "updated_at"
    tracking_column_type => "timestamp"
    schedule => "*/5 * * * *"
  }
}
output {
  stdout { codec => json_lines }
  elasticsearch {
    hosts => ["http://ghost-elasticsearch:9200"]
    user => "elastic"
    password => "password01"
    index => "blog_search"
    document_type => "post"
    document_id => "%{id}"
    doc_as_upsert => true
  }
}- input - jdbc
- jdbc_connection_string:
"jdbc:mysql://mysql-ghost:3306/ghost"
mysql-ghost is the docker service name (dns machine name)
ghost is the database name - jdbc_user => "blog-user"
MySQL user account that can access the Ghost database - jdbc_password => "supersecret"
MySQL user password - statement => "..."
It is the MySQL query that allows to get your Ghost posts from the database - use_column_value => true
- tracking_column => "updated_at"
- tracking_column_type => "timestamp"
- schedule => "*/5 * * * *"
The Frequency of Logstash must launch the MySQL request. For development needs, I do not want to wait too long to make sure my changes are right. In this case, I scheduled Logstash to update the search every 5 minutes.
- jdbc_connection_string:
[success]Tip
If you want to create your own cron expression, you can use https://crontab.guru/every-5-minutes to help you.
- output - elasticsearch
- hosts: you can use the docker service name (DNS machine name)
- user: only if xpack.security is enabled
- password: only if xpack.security is enabled
- index: Elasticsearch index (it will be used for the HTTTP request later)
- document_type: (deprecated) set the doc type (it will be used for the HTTP request later)
- doc_as_upsert: to allow update mode
Statement
The MySQL query used in the statement of Logstash can look a little complicated but it is not. It combines two queries:
SELECT
  id,
  title,
  custom_excerpt,
  slug,
  featured,
  feature_image,
  published_at,
  updated_at,
  type,
  status,
  visibility,
  (CASE type WHEN 'post' THEN CONCAT(DATE_FORMAT(published_at, '/%Y/%m/%d/'), slug) ELSE slug END) as 'url'
FROM posts WHERE `published_at` IS NOT NULL
The first query gets all of the information of all the elements with a published_at date. The most important fields retrieved with this query are:
- id: unique for each post, this is the ID that allows us to update the indexed posts
- title: important for the search results
- custom_excerpt: useful during the search to match with more keywords than just the title
- published_at: the date of the post publishing. The value is NULL if the post was never published
- type: to know if the element is a page or a post
- status: draft or published
- visibility: implemented with the latest versions of Ghost that allow you to create public or private posts
- url: by default, you can use the slug posts/pages only but if you manage the URLs with a customized permalink pattern, you have to build the URL of the posts.
In my case, I chose the following pattern:/{year}/{month}/{day}/{slug}/.
I need to use a SQL CASE to determine if the current item is a post or a page:- If
typeis equal to page, the URL is equal to the slug - If
typeis equal to post, the URL will be based on the published_at date formattedDATE_FORMAT(published_at, '/%Y/%m/%d/')+slug
- If
plaintext: If this field is indexed, it is possible to get the content of your posts from the search without taking the privacy of the post (Members or Paid-members) into account
Status
The status is really important for three use cases:
- When an element is published, the status is published ???
- When an element is drafted, the status is draft. But, it is possible to unpublish an element then the published date still exists but the status changed to draft
- When an element is deleted, it does not exist anymore in the MySQL table and Logstash can not automatically delete the deleted elements.
This is why there is a UNION with another SQL query to identify which element was deleted ?
SELECT
  resource_id as 'id',
  '' as 'title',
  '' as 'custom_excerpt',
  '' as 'slug',
  0 as 'featured',
  '' as 'feature_image',
  NULL as 'published_at',
  NULL as 'updated_at',
  resource_type as 'type',
  'deleted' as 'status',
  '' as 'visibility',
  '' as 'url'
FROM actions WHERE `resource_type`='post' AND `event`='deleted'
The actions table is like a log of events for Ghost. You can find when a resource was created, edited, deleted, and the same for the pages.
In the case of a UNION SQL query, both queries have to return the same number of columns and to avoid any ambiguity with the column names, I assign in the second query the same names as the first one:
- resource_id as 'id': in the actions table, the id column matches with the id of the action/event and not the post/page. Hopefully, the resource_id column matches with the id of the post/page objects (user id, tag id, api_key id, etc.)
- resource_type: with value as post for the posts and the objects of the page (unfortunately, if it was a page, after deleting it, it becomes a post ?. But it is not important because you deleted it ?)
- event: is the type of event that occurred on a specific object (added, edited or deleted)
Launch your Elasticsearch stack
At this point, your Elasticsearch is ready, your Logstash can access your MySQL database and create an index. It is time to launch the stack:
docker-compose -f elasticsearch-ghost.yml upAs you can see, I choose to not add the -d option to see the output log directly from the console and ensure everything is ok. After 5 minutes, you should see something like this:
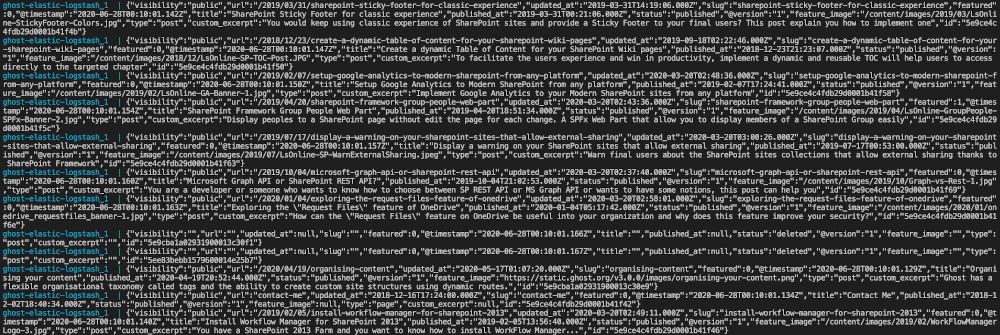
If you can see that, that means your Logstash server has to access to your database and is getting the content in accordance with the SQL query.
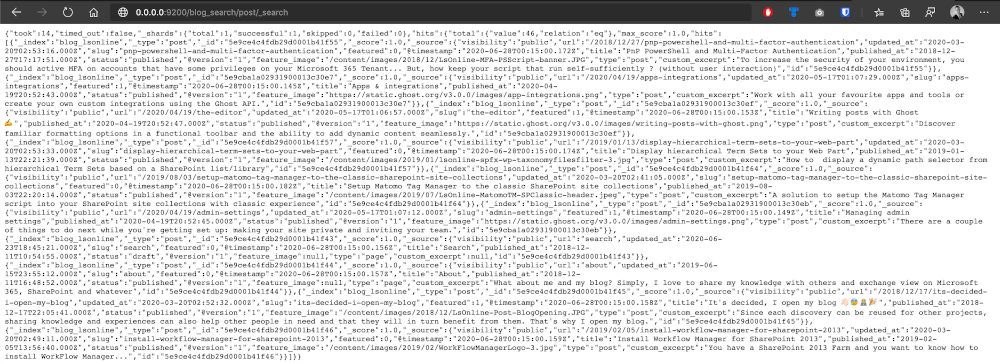
We have to check one more thing... The Elasticsearch endpoint access. To test it, it is quick:
- Open your favorite browser
- Enter the URL http://0.0.0.0:9200/blog_search/post/_search (change the IP address if you are not testing on your local computer)
- blog_search: is the Elasticsearch index
- post: is the doc_type (deprecated)
- _search: Elasticsearch endpoint
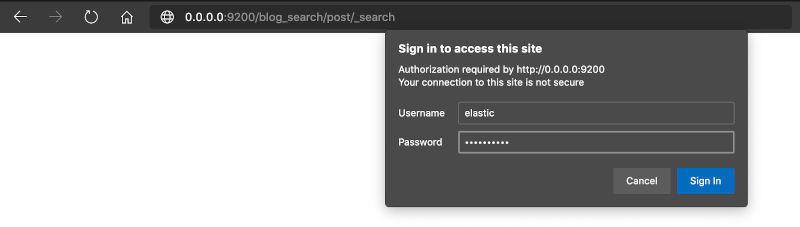
[note]Note
If you choose to enable the security, you will be asked for credentials (user: elastic, password: [your password]).
[note]Note
By default, Elasticsearch returns 10 results.
You are now ready to use it as a search engine ????
What's next
In the next part, I will share with you how to request and expose your Elasticsearch engine for your Ghost blog.

Hoping this post will help you ?
You may also be interested in